CNC Toolkit

A suite of add-ins for Autodesk Fusion 360, built to design plywood furniture and fit-outs cut on a CNC router. Tenons, mortises, half-lap joints, dogbones, part patterns along a path, engraving and nesting, all in a single palette.

Download CNC Toolkit Support us

Zip file, 570 KB · version of October 25, 2026 · source code on GitHub
Interface in English or French: click the flag in the CNC Toolkit window.

The tools

Modeling

  • CNC ExtrudeWorks like Fusion's own Extrude, but remembers your last settings and offers plywood thickness shortcuts.
  • CNC Pattern on PathSpreads library parts (with tenons) along several paths; the parts follow every change to the path.

Engraving and labeling

  • CNC EngraveEngraves part names (or your own text) on the selected faces.

Tenon and mortise joinery

  • CNC TenonsCreates tenons on plywood edges, with adjustable spacing and centering.
  • CNC MortiseCuts the mortises that match the tenons.
  • CNC ClearanceApplies a fit clearance to the mortises.
  • CNC UpdateRebuilds the mortises and clearance in one click after a model change.
  • Inner EdgeSelects the mortises and applies a fit clearance.

Cutting

  • CNC NotchCreates half-lap joints between a target body and one or more crossing bodies.
  • JointSplits a body into several pieces joined by a puzzle shape.
  • CNC DogboneAdds dogbones in the inside corners of half-laps, mortises and tenons, sized to your bit diameter.

Fabrication

  • CNC NestingLays parts flat on sheets (nesting), grouped by thickness, with DXF export.

Selection and utilities

  • Select Face CNCSelects every face coplanar with the clicked face.
  • Component debugReplaces duplicate part numbers with the component name.
  • Edit ClearanceChanges the size of every clearance in the project in one click.
  • CNC PurgeRemoves everything CNC Toolkit created on the selected bodies.
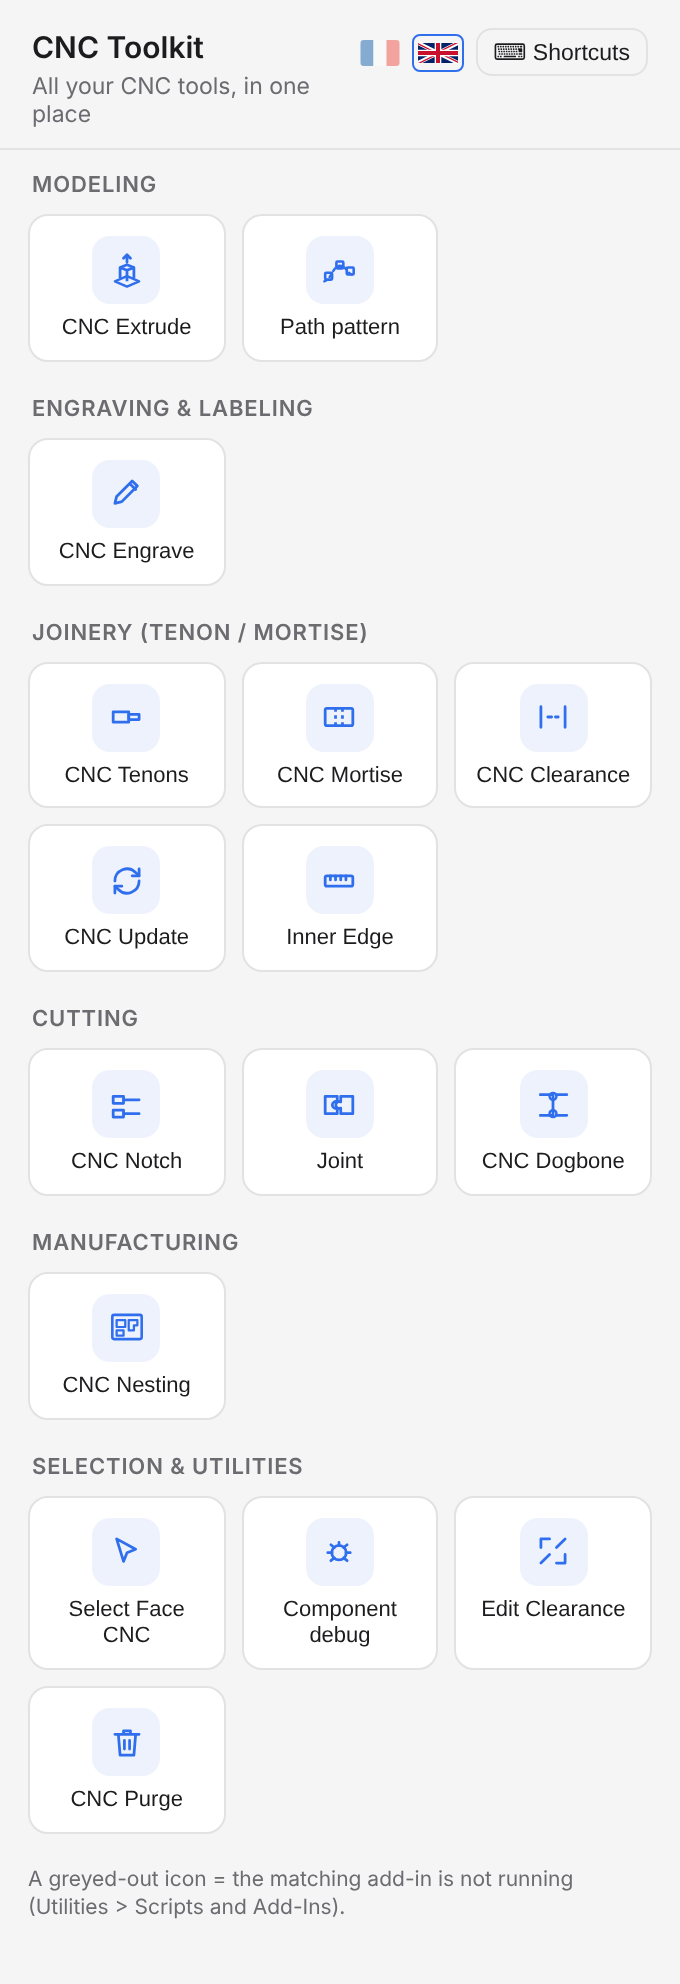
The CNC Toolkit palette in Fusion 360, with tools grouped by category
The CNC Toolkit palette: click an icon to launch the tool.

The tools in action

Modeling · new

CNC Pattern on Path

CNC Pattern on Path spreads parts along one or several paths: uprights under a curved shelf, rails, spacers. You draw the part once in the library, with its tenons, then click the paths. Each path has its own settings in a small panel, right in the viewport.

Fully parametric: every change to a path is taken into account and all parts update by themselves. The first part stays at the start of the path and the last part stays at the end.

  • Parts library: "New object" creates a body or a component (width, height, plywood thickness, tenons on the edges), with a dimensioned preview
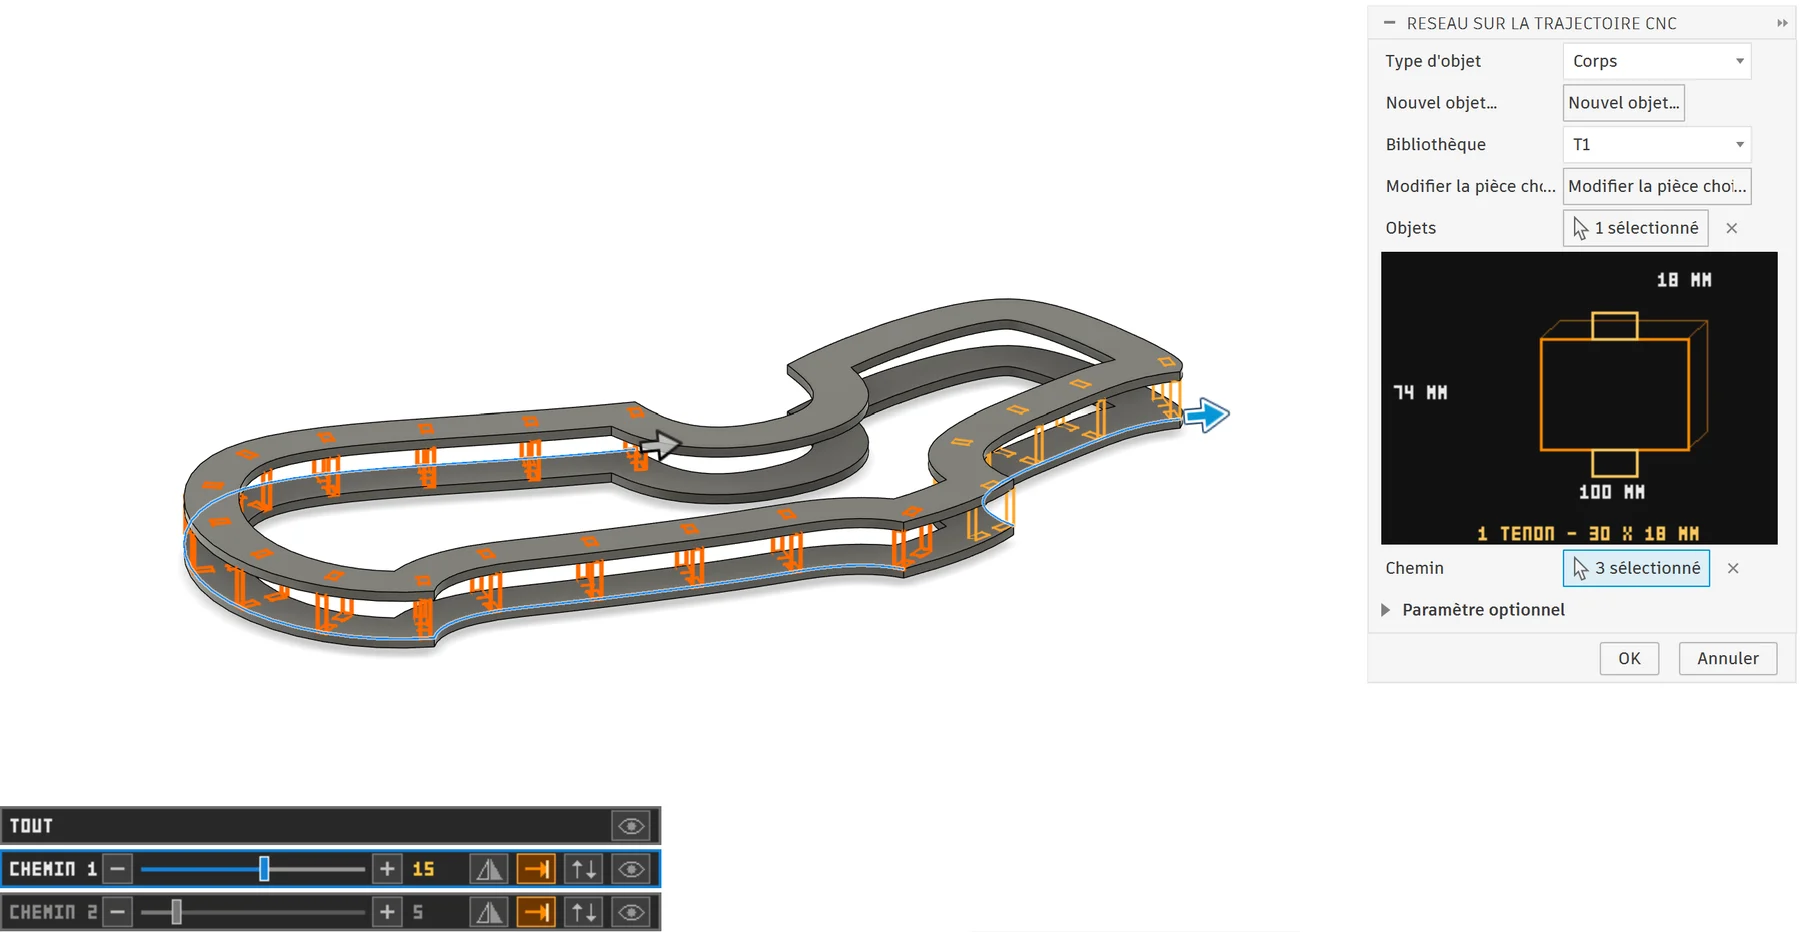
  • Several paths at once, each with its own quantity, symmetry, "to the end of the path" and part direction
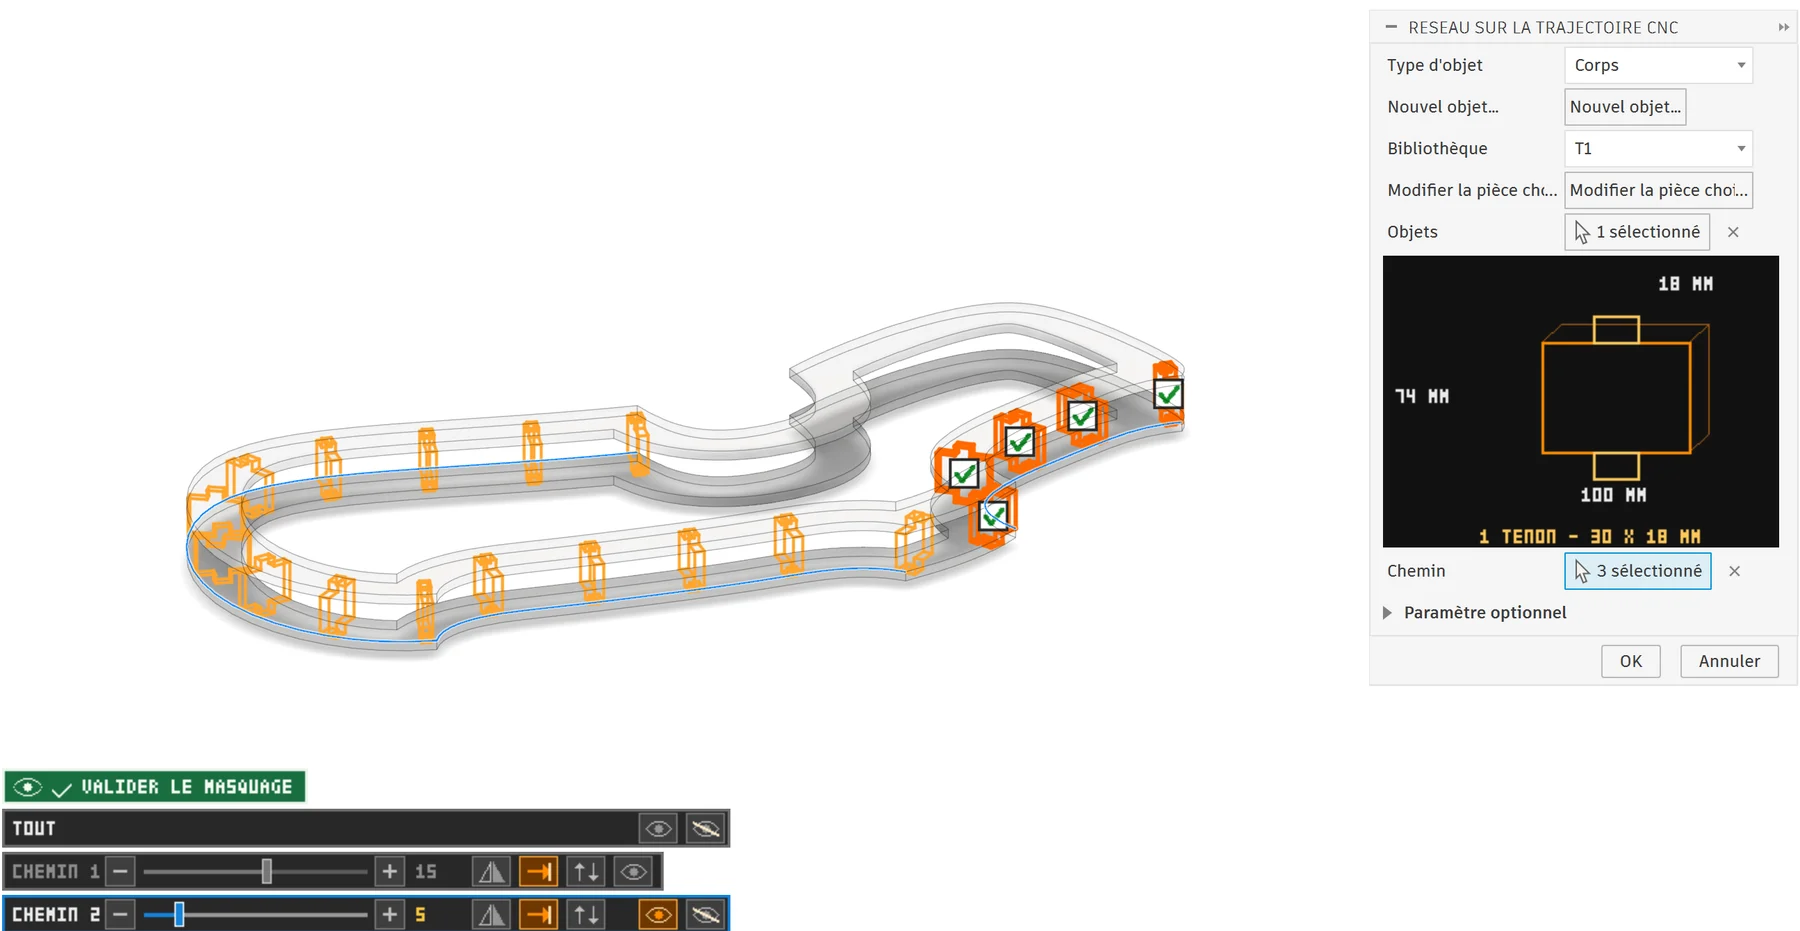
  • Hide or show several parts on several paths at the same time
  • Quantity based on path length, copies numbered in sequence (T1 (1), T1 (2)…)
  • Left, center or right reference, offsets, and part laid against a plane
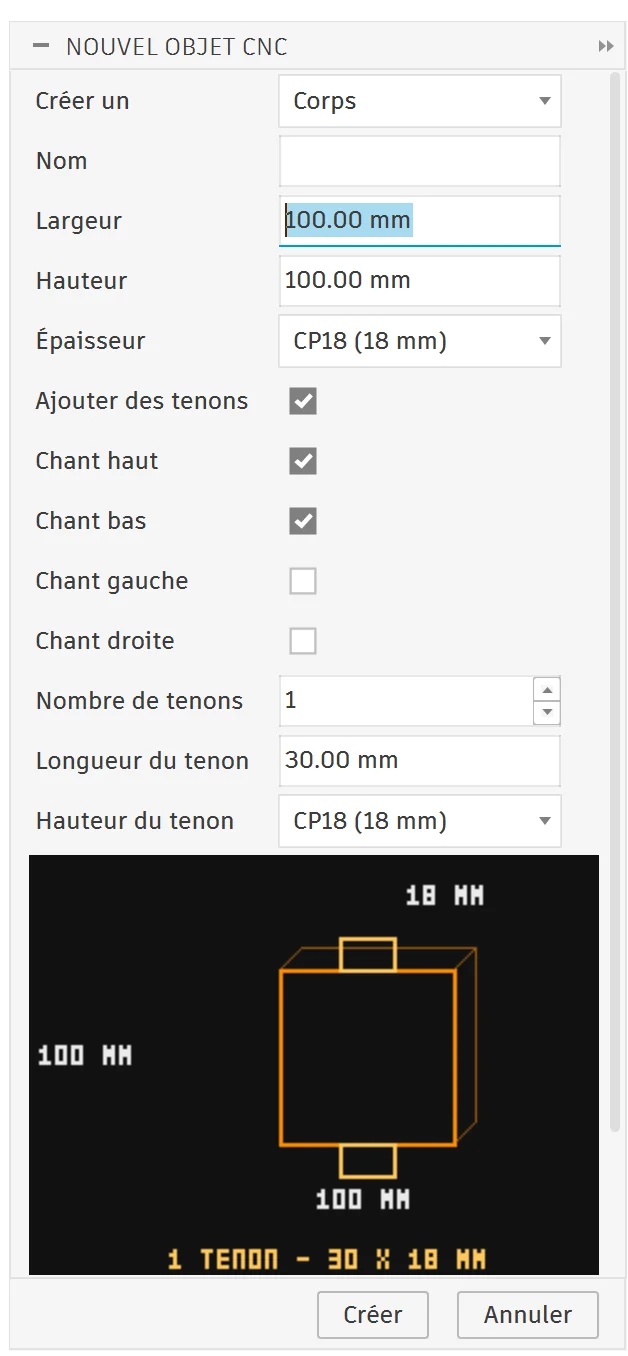
New CNC object dialog: 100 x 100 mm body in 18 mm plywood, tenons on the top and bottom edges, dimensioned preview on black
1Create the partBody or component, size, thickness and tenons, with a dimensioned preview.
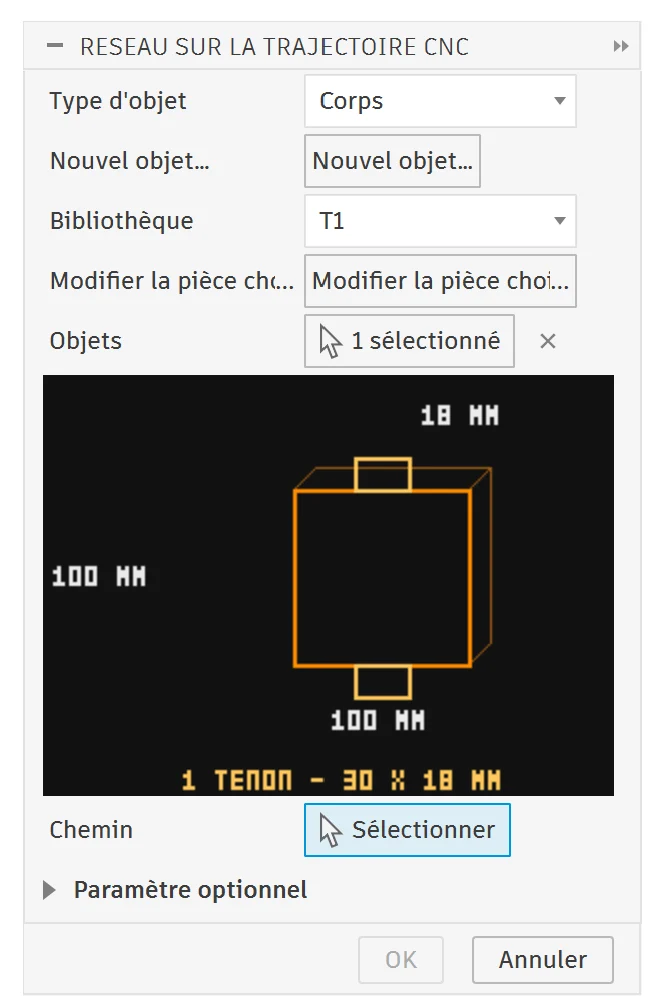
CNC Pattern on Path dialog: part T1 picked from the library, 100 x 100 mm preview with one 30 x 18 mm tenon
2Pick it from the libraryThe part is remembered for the next patterns and stays editable.
Two-level curved shelf: three paths selected, uprights with tenons in orange preview, path panel with quantity sliders and icons
3Several paths at onceOne row per path: quantity slider, symmetry, to the end of the path, flip and eye.
Hiding parts: five uprights ticked on a path, green Confirm hiding button
4Hide partsTick the parts to remove on one or several paths, then confirm.
Cutting

CNC Joint

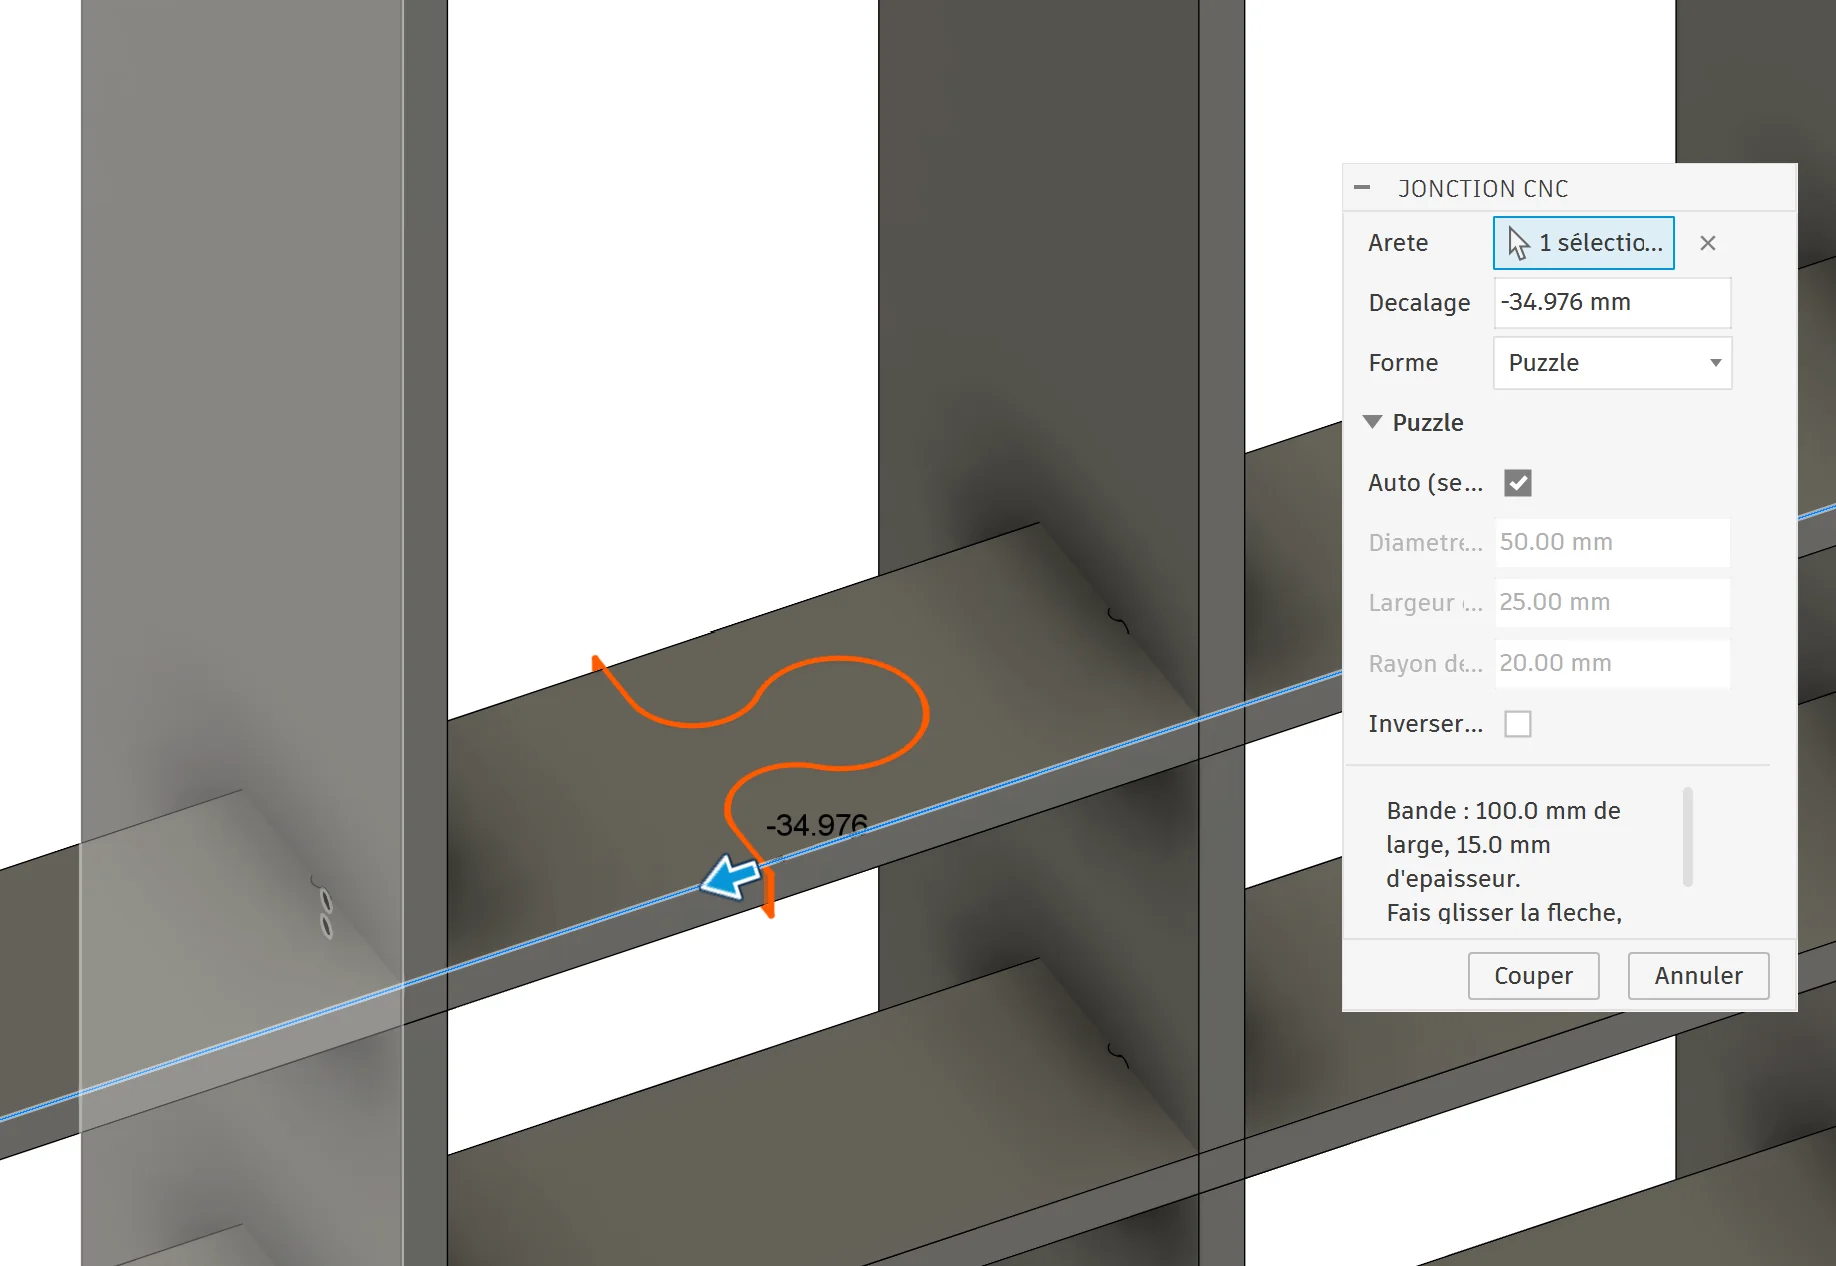
Part too long for the sheet? CNC Joint splits it into two pieces that lock together like a puzzle. Click an edge, then drag the arrow to where you want the cut: the shape is drawn live on the part.

  • Puzzle shape sized automatically from the part's width and thickness
  • Head diameter, neck width and fillet radius adjustable by hand
  • Position to the millimeter, with the arrow or by typing the offset
  • Flip the joint direction in one click
CNC Joint dialog in Fusion 360: selected edge, orange puzzle-shape preview on a shelf, offset arrow
1Place the jointLive preview while you adjust it.
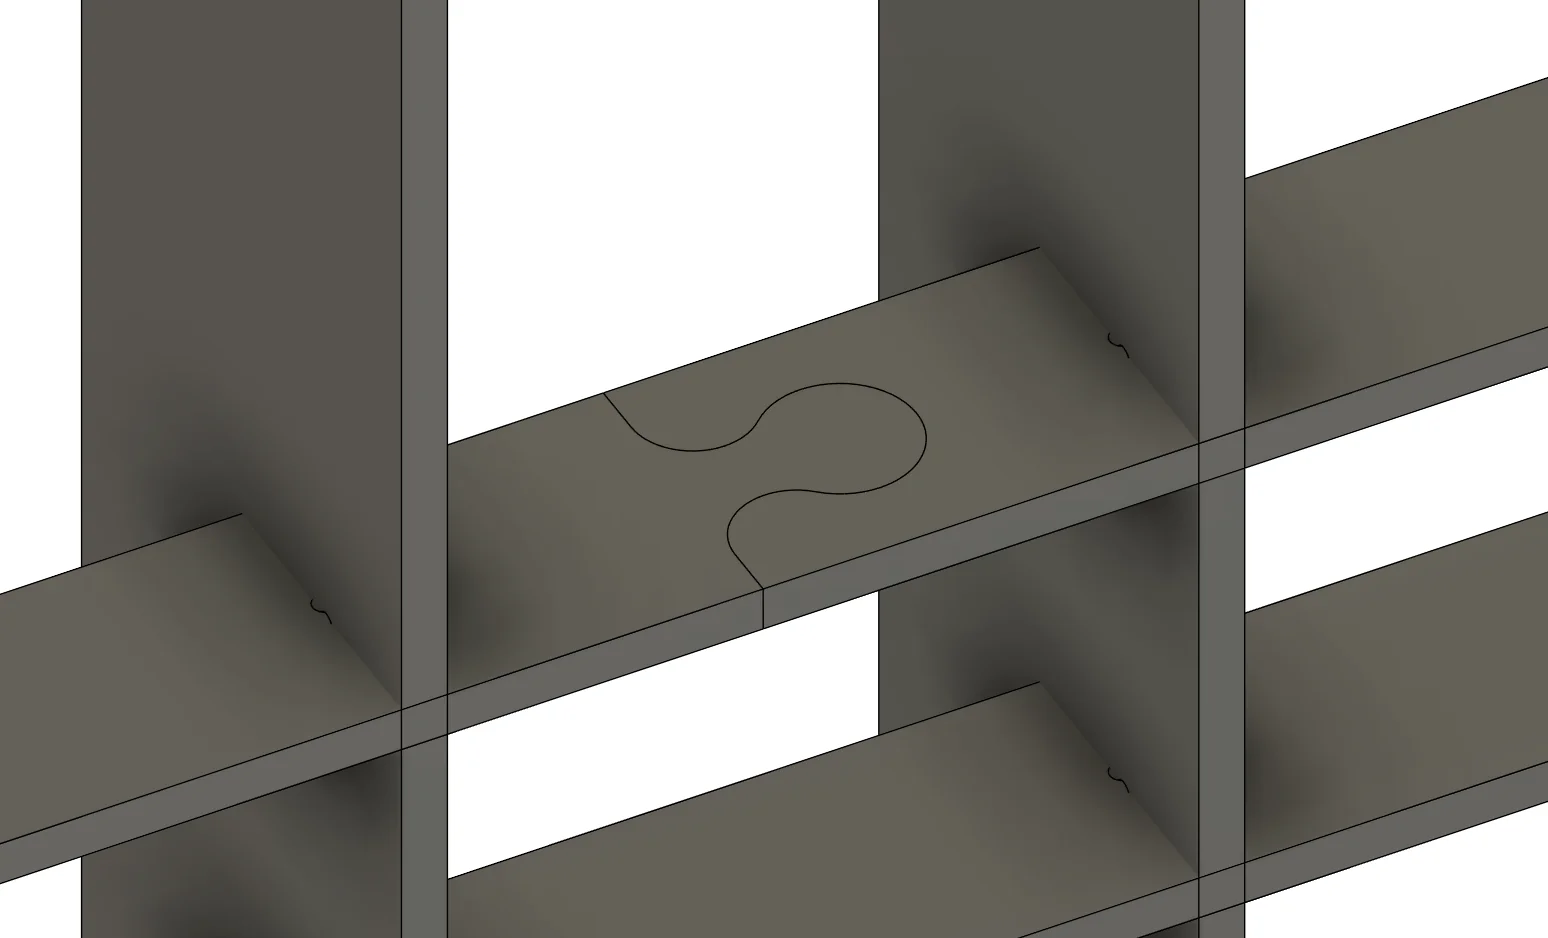
Shelf split into two pieces joined by a puzzle shape
2CutTwo pieces ready to machine, assembled without hardware.
Cutting

CNC Notch

Where two panels cross, CNC Notch joins them with a half-lap: each part gets half of the notch and they slot into each other. Select the target part, then one or more parts crossing it, and the preview instantly shows what will be removed on each side.

  • Several crossings handled in one go
  • Depth split in proportion to width, 50/50, or typed by hand
  • Fit clearance and dogbones added automatically if you wish
  • Flip the direction, and update in one click when the model changes
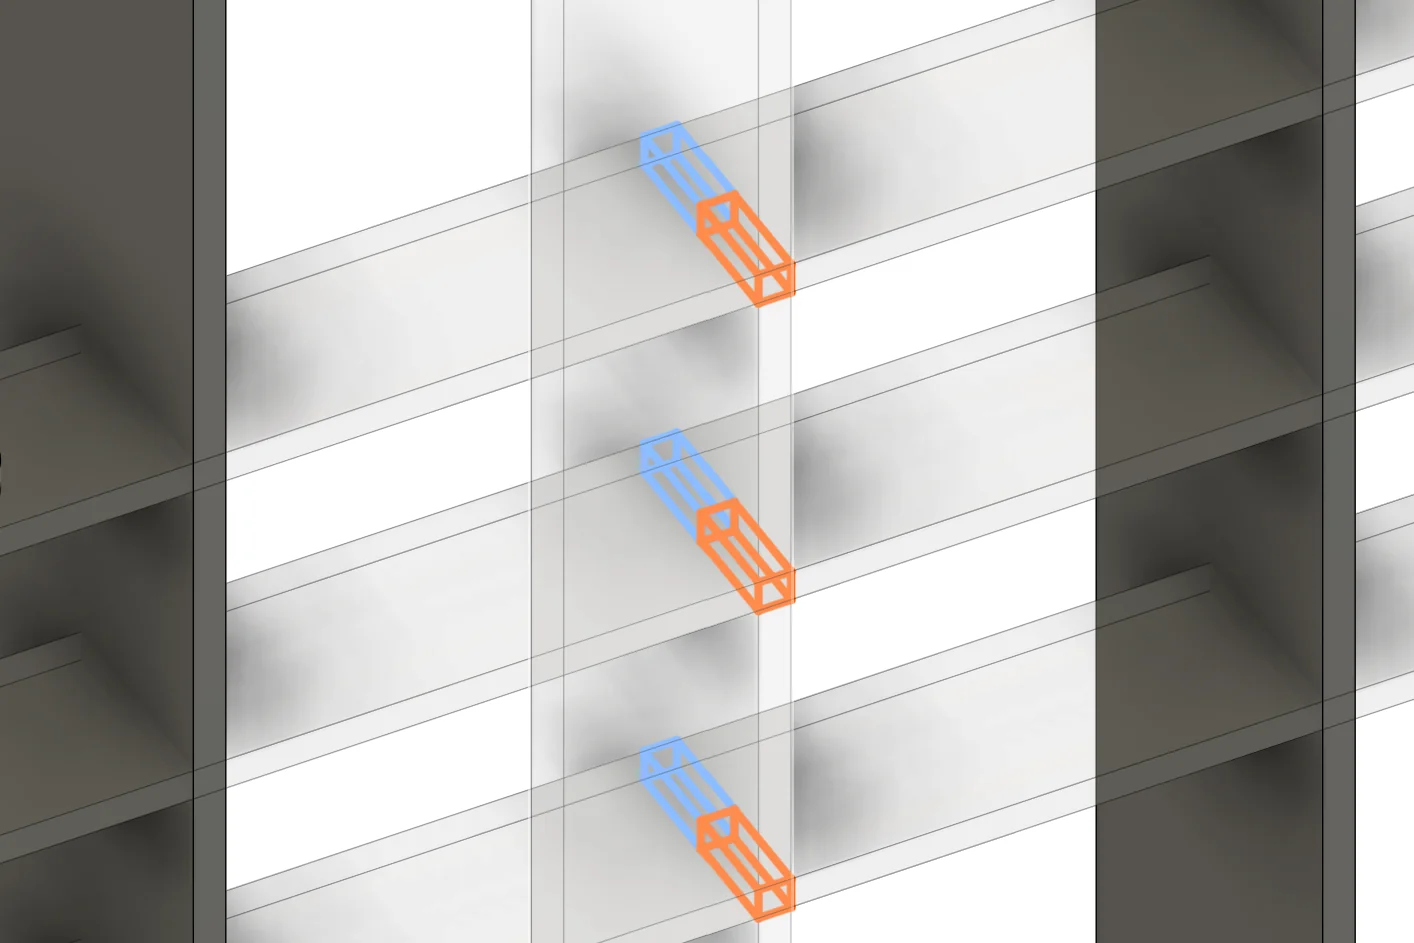
CNC Notch preview: three shelf crossings, the material to remove shown in blue in one part and orange in the other
1Notch previewBlue and orange show what is removed from each of the two parts.
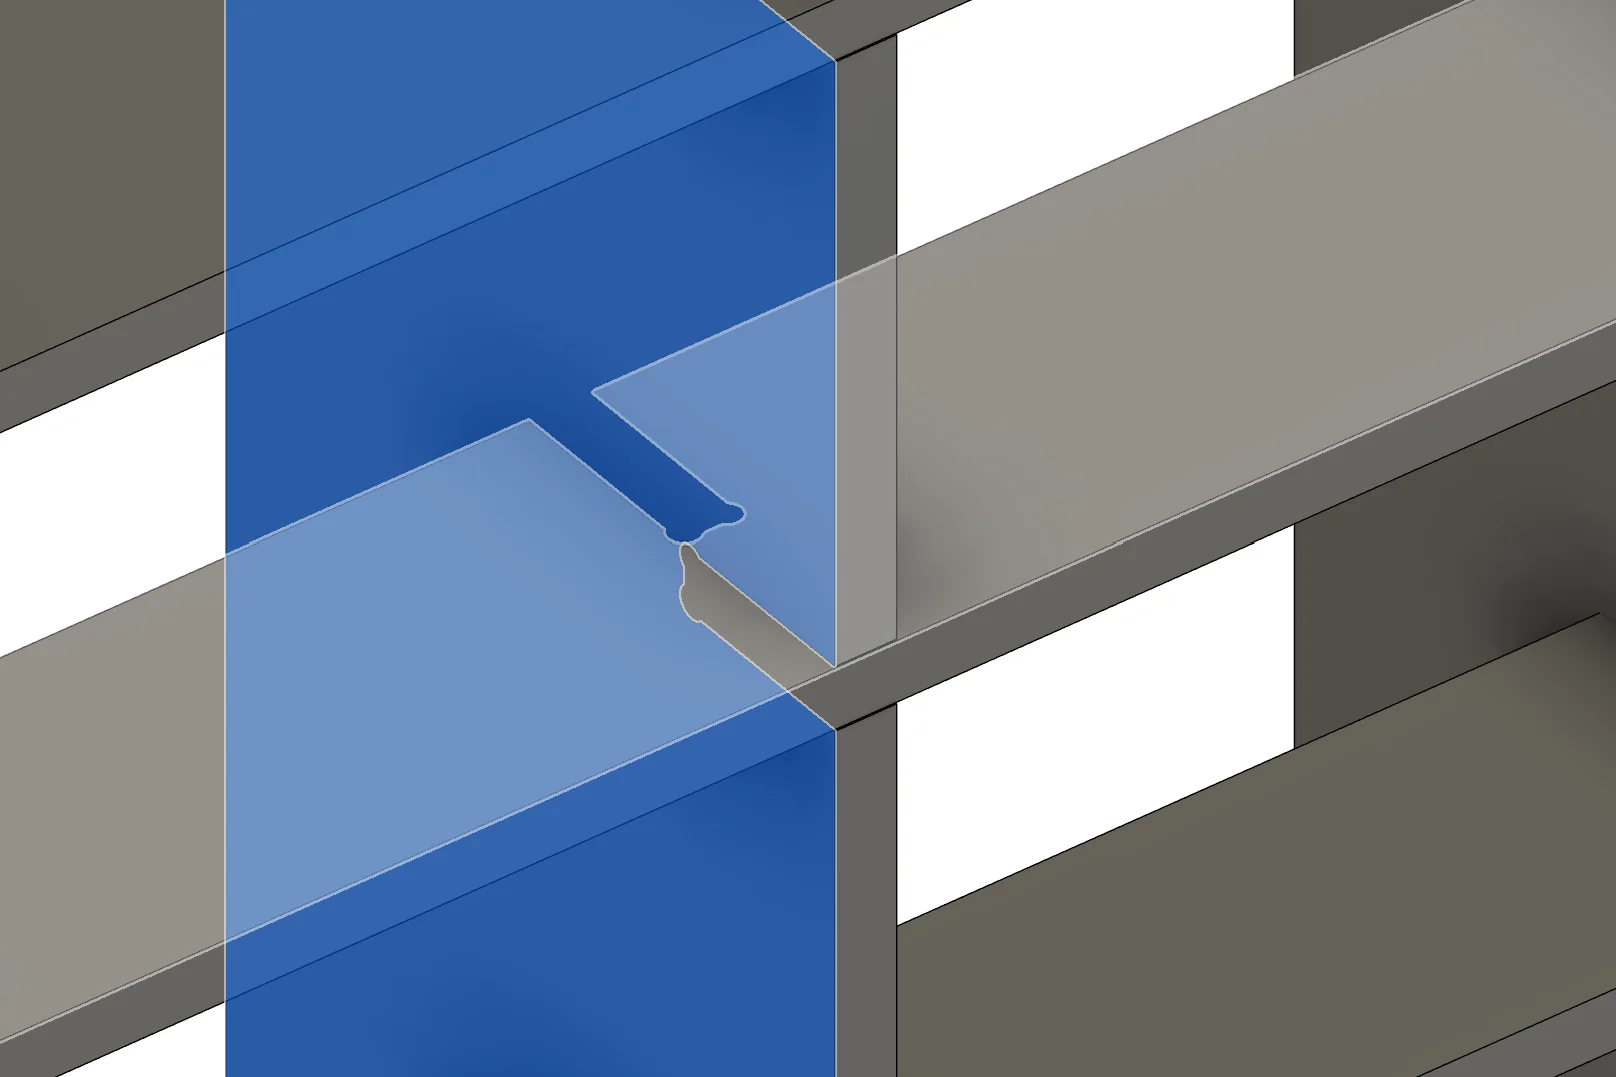
Finished half-lap joints, with dogbones in the corners
2Half-lap jointThe parts slot together, with dogbones in the corners for the bit.
Fabrication

CNC Nesting

Once the furniture is designed, CNC Nesting lays every part flat on sheets, ready to machine. Parts are grouped by thickness with the engraved face up, and each sheet appears in the palette with its fill rate.

  • The whole model or just the selection, grouped by thickness
  • Adjustable sheet sizes, edge margin and part spacing
  • Flat copies or the real parts moved, and back to the assembly in one click
  • DXF export, one file per sheet, for your CAM software
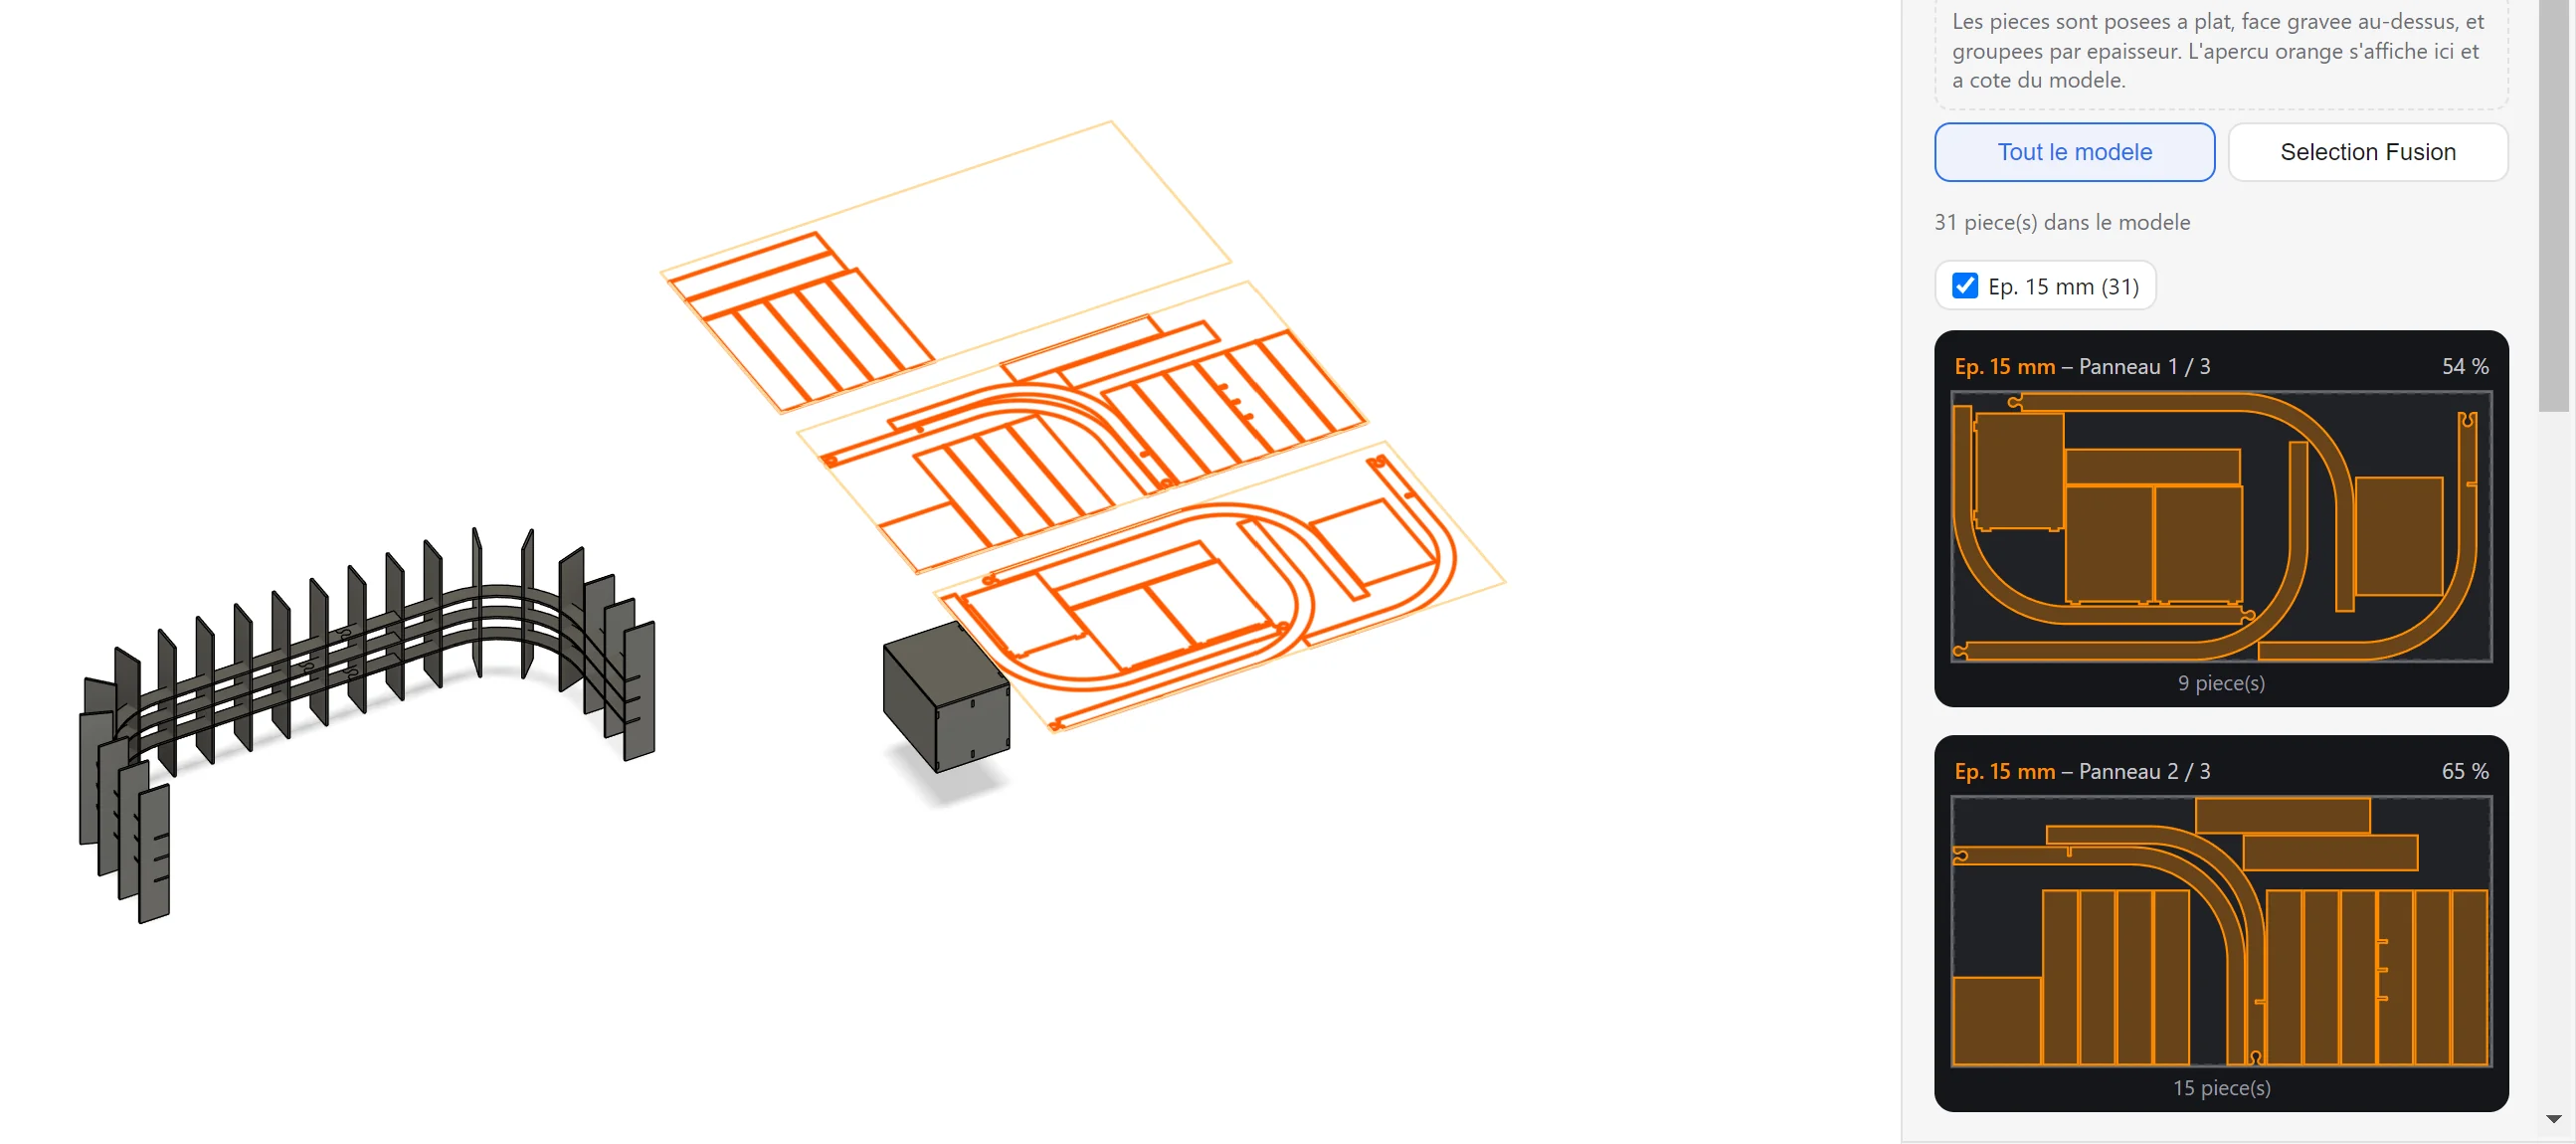
CNC Nesting: a curved 31-part piece of furniture next to its parts laid flat on three sheets in orange; the palette shows each sheet with its fill rate
✓31 parts on 3 sheetsThe orange preview appears next to the model and in the palette, sheet by sheet.

Installation

  1. Download CNC_Toolkit_Installation.zip with the button above.
  2. Right-click the zip, then Extract All… Don't run the script from inside the zip.
  3. Close Fusion 360.
  4. Double-click INSTALLER.bat in the extracted folder. If Windows shows “Windows protected your PC”, click More info then Run anyway. Any version already installed is set aside, never overwritten.
  5. Open Fusion 360, press Shift+S (Scripts and Add-Ins), Add-Ins tab. Select ToolkitCNC, check Run on Startup, then click Run.

The CNC Toolkit palette appears, and will start on its own every time Fusion launches.

ToolkitCNC isn't in the list?
Click the green + next to “My Add-Ins” and choose the folder %APPDATA%\Autodesk\Autodesk Fusion 360\API\AddIns\ToolkitCNC
Manual install (Mac, or without the script)
Copy the ToolkitCNC folder from the zip into Fusion's AddIns folder, then follow step 5.

Support CNC Toolkit

CNC Toolkit is free. If it saves you time in the workshop, you can help fund its development through the crowdfunding page.

Support us